


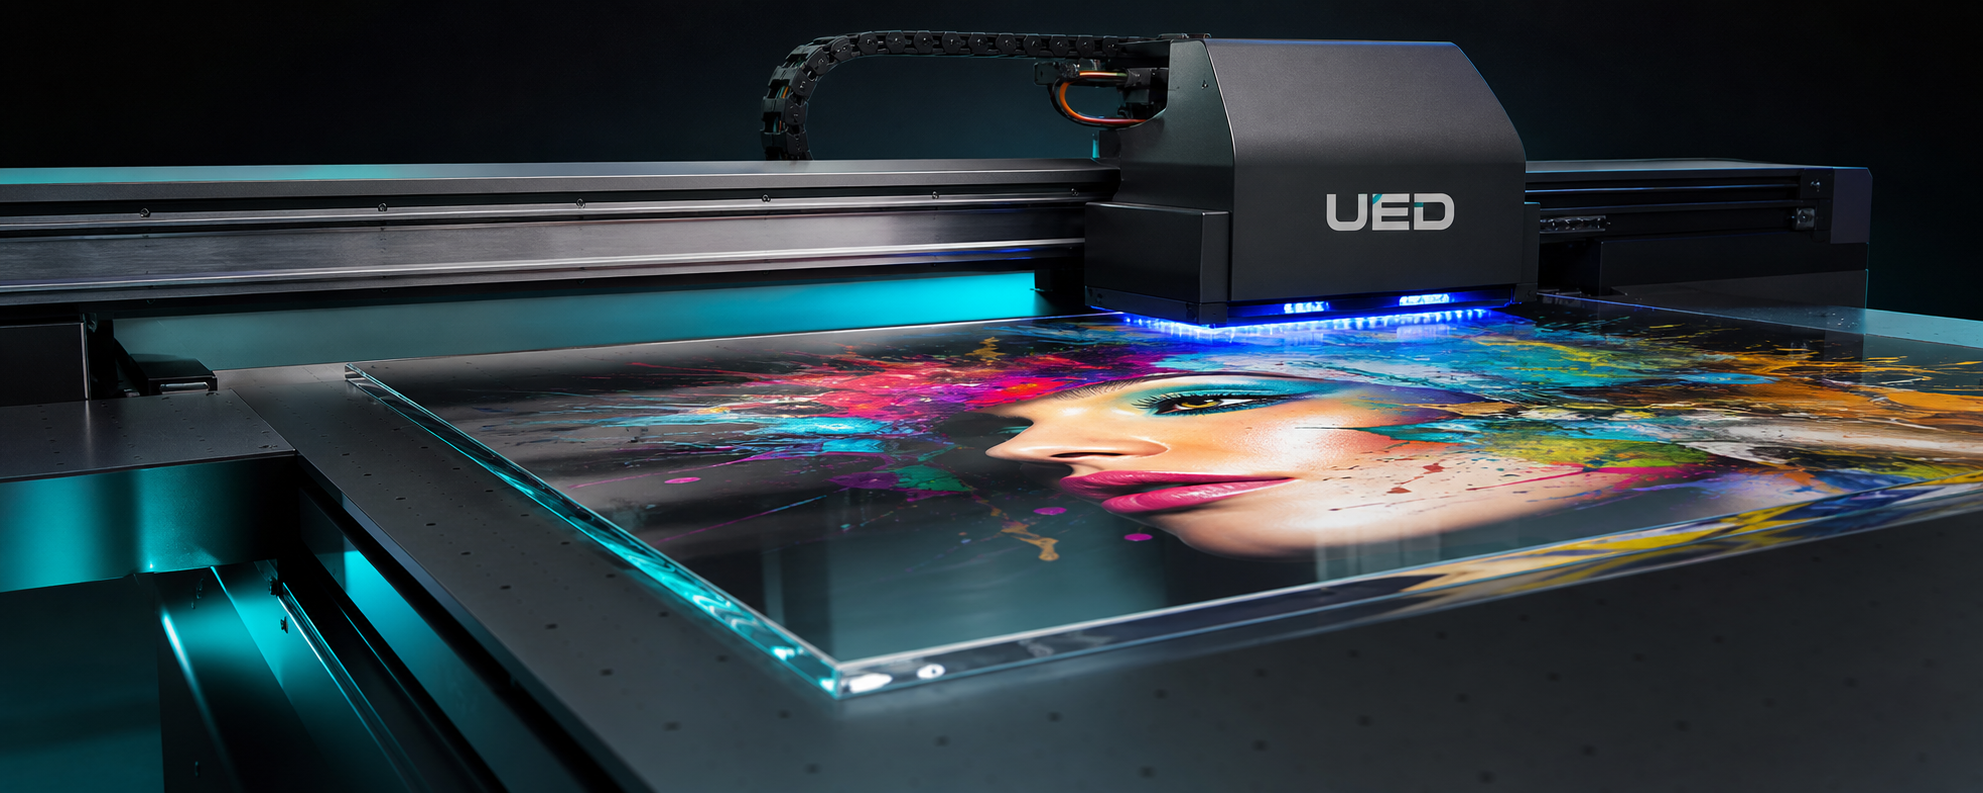
Acrylic (polymethyl methacrylate, sold as Plexiglas, Perspex or Acrilyte) is one of the highest-margin substrates a digital print shop can offer. It looks like glass at a fraction of the weight, cuts and polishes beautifully, and — when printed directly with a UV flatbed printer — carries vibrant, durable graphics that would take hours to reproduce with vinyl or screen printing. This guide explains exactly how UV printing on acrylic works, what preparation it needs, which machine class suits the job, and where the profit is.
Why acrylic is a natural fit for UV printing
UV inkjet cures ink instantly with ultraviolet lamps rather than letting it dry or absorb. That matters enormously for acrylic, because acrylic is non-porous: solvent or eco-solvent inks have nothing to bite into and would sit on the surface, smear and eventually flake. UV ink, by contrast, polymerises into a solid film the moment it is cured, anchoring itself to the smooth acrylic surface. The result is a graphic that is scratch-resistant, water-resistant and suitable for indoor and sheltered outdoor use.
Equally important is that UV printing is a cold process. Acrylic is sensitive to heat — it can warp, soften or develop stress cracks under thermal processes. UV LED curing generates very little heat, so even thin 2 mm sheets print flat without distortion. You also get the option of printing a vivid full-colour image, a crisp single-colour logo, or a frosted/white-ink effect, all in a single pass.
How the ink bonds to acrylic
Acrylic has a relatively high surface energy compared with polypropylene or polyethylene, which means UV inks generally adhere well without primer. That said, adhesion is never guaranteed by material name alone. Cast acrylic and extruded acrylic behave slightly differently, and sheets that carry a protective film, a static-attracting dust layer or a factory coating will bond less reliably. A simple cross-hatch tape test on a spare offcut is the professional way to confirm adhesion before committing a production run.
For jobs that must survive handling, transport or outdoor exposure — signage that will be cleaned repeatedly, for example — many shops add a thin adhesion promoter or use a printer with a built-in primer option. On a well-configured UV flatbed printer, though, most acrylic work bonds directly and passes a tape test with a clean lattice.
Surface preparation: the five-minute routine that prevents reprints
Nearly every adhesion failure on acrylic traces back to surface contamination, not to the printer. Acrylic is also statically charged, so it actively pulls dust out of the air; that dust lands between the printhead and the sheet and shows up as pinholes. A disciplined prep routine pays for itself:
- Remove the protective film fully and check for residue along the edges.
- Wipe the print face with isopropyl alcohol and a lint-free cloth to lift grease and film residue.
- Use an anti-static brush or ionising bar immediately before printing to neutralise charge and lift dust.
- Lay the sheet flat and, if it is thin, secure it with a vacuum bed or edge tape so it cannot lift during head passes.
- Keep sheets in the print room for a few hours beforehand so they reach ambient temperature and do not fog.
White ink and varnish: unlocking acrylic’s best effects
Acrylic is usually clear or opal, so printing colour alone gives a translucent, stained-glass look. That is sometimes desirable — backlit displays, lightbox panels and window graphics genuinely benefit from translucency. But for a solid, photographic image you need a white under-base. A UV printer with a white ink channel prints a layer of white first (or simultaneously), then lays colour on top, giving full opacity on clear acrylic.
The same white channel enables “day-and-night” backlit work: print white, then colour, then white again, so the panel reads solid in daylight and glows correctly when lit. A varnish or gloss channel adds spot texture and protection — a high-gloss varnish over acrylic makes the print look almost laminated, while a matte varnish tames reflections for retail environments.
Which machine class suits acrylic work
Acrylic is rigid and comes in sheets, so it is fundamentally a flatbed job. A UV flatbed printer with a vacuum bed, decent Z-height (acrylic panels, boxes and fabricated pieces vary in thickness) and a white ink option covers the bulk of acrylic demand: signage, displays, awards, splashbacks and point-of-sale. If your business also runs flexible media, a UV hybrid printer lets you print rigid acrylic and roll media on one frame, which is attractive for mixed shops. Pure roll-to-roll machines are the wrong tool here — acrylic does not roll.
When comparing machines, look past the headline size. Bed flatness and vacuum zoning matter more on acrylic than on almost any substrate, because any bow in a thin sheet changes the head gap and shows up as banding. Ask for the maximum print height, the number of vacuum zones, and whether the machine supports simultaneous white+colour printing, which roughly doubles throughput on backlit work.
Typical acrylic products and where the margin lives
The applications list is long and the margins are good because acrylic reads as premium. Common paid work includes retail point-of-sale stands and shelf edges, estate-agent and office signage, menu boards, reception logo panels, awards and trophies, exhibition graphics, protective splashbacks with printed décor, and backlit lightbox panels. Because UV printing handles a single piece as cheaply as a run, one-off personalised acrylic items — house numbers, name plates, wedding décor — are a genuinely profitable niche with no minimum order.
Cost and ROI in practice
UV ink consumption on acrylic is modest for standard coverage; white ink and varnish add to it, so quote backlit and textured jobs accordingly. The real economics, though, come from labour compression: a design that would take an hour of cutting, weeding and applying vinyl is printed in minutes with no weeding at all, and complex full-colour artwork costs no more than a simple logo. Most shops price acrylic by the square foot with a premium over plain PVC because the substrate and the finish both read as higher value.
Common mistakes to avoid
- Printing through or over residual protective-film adhesive.
- Skipping anti-static treatment and getting dust pinholes.
- Ignoring head height on thick or fabricated acrylic and striking the sheet.
- Using a colour-only profile on clear acrylic and wondering why the image looks washed out.
- Stacking freshly printed sheets before the surface has fully cooled and settled.
Frequently asked questions
Does UV ink stay on acrylic outdoors?
Yes, UV inks are UV-stable and water-resistant, and printed acrylic performs well outdoors for years, especially with a varnish top-coat. For harsh, full-sun installations, confirm your ink set’s outdoor rating with your supplier.
Can I print on both sides?
Yes. Double-sided acrylic signage is common; just allow cooling time and handle edges to avoid fingerprints on the first side.
Do I need primer on acrylic?
Usually not. Acrylic’s surface energy lets UV ink bond directly. Test first; add an adhesion promoter only for high-abuse or safety-critical applications.
A step-by-step production workflow
A repeatable workflow is what separates a hobby result from a sellable product. Start with artwork prepared in the right colour profile and at print resolution, ideally 1:1 size with cut marks if the sheet will be trimmed. Check the acrylic for film, then wipe with isopropyl alcohol and run an anti-static pass. Place the sheet on the vacuum bed, confirm it is flat, and set the head height from the thickest point of the material, not the bed. Print a small test strip on an offcut when switching ink batches or material supplier. Then run the job, watching the first few passes for banding or dust shadows. After printing, allow a brief settle, peel any masking, and inspect under raking light for pinholes before packing with interleaving so faces do not contact each other.
Backlit and lightbox work in depth
Backlit acrylic is where UV printing shows a clear advantage over almost every alternative. The standard recipe is white, colour, white — a base white for daylight opacity, the colour image, then a second white tuned so the lit version is not washed out. Getting the balance right requires a profile or at least a tested recipe, because too much top white makes the backlit image milky while too little lets the light show through the colour. Many shops keep a dedicated backlit recipe in the RIP. The payoff is strong: lightbox menus, illuminated wayfinding, glowing retail displays and backlit exhibition panels all command premium prices, and acrylic is the preferred face material because it is lighter and safer than glass at large sizes.
UV printing versus vinyl and screen printing on acrylic
Applied vinyl has been the traditional route, but it adds weeding, application time, edge lift over time and visible seams on large sheets, and it cannot reproduce a photographic gradient economically at one-off scale. Screen printing suits very long single-colour runs but is uneconomic for short runs and full colour. UV digital printing removes minimums, handles any artwork, prints white and varnish, and finishes in minutes. The result is that UV has taken the short-run, full-colour and personalised middle of the market entirely, and increasingly the long-run work too as machine speeds rise.
Ink choice: rigid versus flexible
Acrylic signage is rigid, so rigid UV inks give the sharpest detail and best scratch resistance. Flexible inks matter when the printed piece will be bent, drilled or thermoformed after printing — acrylic that is scored and folded, or drilled near a printed edge, can crack a brittle ink film. If your acrylic work includes fabricated pieces, choose an ink set with some flexibility or confirm crack resistance on drilled and bent samples. This is exactly the kind of test to run when commissioning a new UV flatbed printer.
Keeping the machine acrylic-ready
Acrylic work is unforgiving of poor maintenance. White ink must be circulated and stirred to avoid pigment settling, and a clogged white channel kills backlit work first. Keep the bed clean of ink overspray so sheets sit flat, check vacuum zones for leaks, and keep the print environment dust-controlled because acrylic’s static attracts every particle in the room. An ionising bar at the loading position is a small addition that dramatically cuts pinhole reprints.
Who buys printed acrylic
The buyer list is broad: retail chains and shopfitters for point-of-sale and wayfinding, estate agents and offices for signage, hospitality for menu boards and reception panels, event and exhibition companies, awards and gift retailers, interior designers for splashbacks and feature panels, and a large tail of individual consumers for personalised décor. Because acrylic reads as premium, it supports good margins across all of these, and the one-off capability opens online and counter sales that rigid-PVC signage never did.
A practical buying checklist for an acrylic-focused machine
If acrylic will be a core product, evaluate machines against the jobs you actually win. Bed size should cover your largest common sheet with margin, because tiling a big lightbox across two passes is where registration problems appear. Vacuum zoning should be fine enough to hold a small award plate as firmly as a full sheet. Z-height and a reliable media-height sensor protect you when a fabricated acrylic piece is thicker than expected. A genuine white-ink circulation system is non-negotiable for backlit and clear work. And ask for a live demonstration printing white plus colour simultaneously on clear acrylic, because that single test reveals more about a machine’s acrylic capability than any spec sheet. Our team can walk you through these criteria against the digital UV printer range.
Pricing models that capture the value
Charging only by the square foot leaves money on the table with acrylic, because the value is in the finish and the application, not the area. A small award plaque and a large sign may use similar ink but very different design and handling effort. Successful shops therefore combine a base per-square-foot rate with application premiums: backlit recipes, double-sided printing, varnish or texture, drilling and polishing, and fitting or installation. One-off personalised items are priced per piece from a menu, which keeps quoting fast at the counter. The discipline to price the finish — not just the ink — is what makes acrylic one of the best-margin lines in the shop.
Retail, events and the personalisation tail
Acrylic’s premium feel makes it the material of choice for retail point-of-sale launches, where brands want dozens of identical high-gloss displays fast, and for events and weddings, where one-off name plates, seating charts and welcome signs are produced in an afternoon. The same machine serves both ends of the market: repeatable branded runs on one day and single personalised pieces the next. Building a small online or counter menu of acrylic products — house signs, photo blocks, awards, cake toppers — creates a steady consumer stream that smooths out the trade cycle and introduces walk-in customers to your wider capabilities.
Troubleshooting the three classic acrylic defects
Pinholes almost always mean dust or static; fix the environment and add an anti-static step rather than reprinting blindly. Banding on thin sheets usually means the sheet is bowing into a varying head gap; improve vacuum hold-down or print with a slightly higher head and more passes. Poor adhesion or flaking on an otherwise good machine usually traces to film residue or a contaminated wipe cloth; switch to fresh lint-free wipes and alcohol, and retest. Keeping a written log of defect, cause and fix turns these from recurring costs into one-time lessons.
Conclusion
Acrylic rewards the print shop that treats preparation seriously: clean, de-staticed, flat sheets, a white ink strategy for clear material, and a flatbed with a good vacuum bed. Get those right and acrylic becomes one of your most profitable, most requested substrates. If you are evaluating machines for acrylic work, browse our digital UV printer range or talk to our team about bed size, white ink and throughput for your market.
