



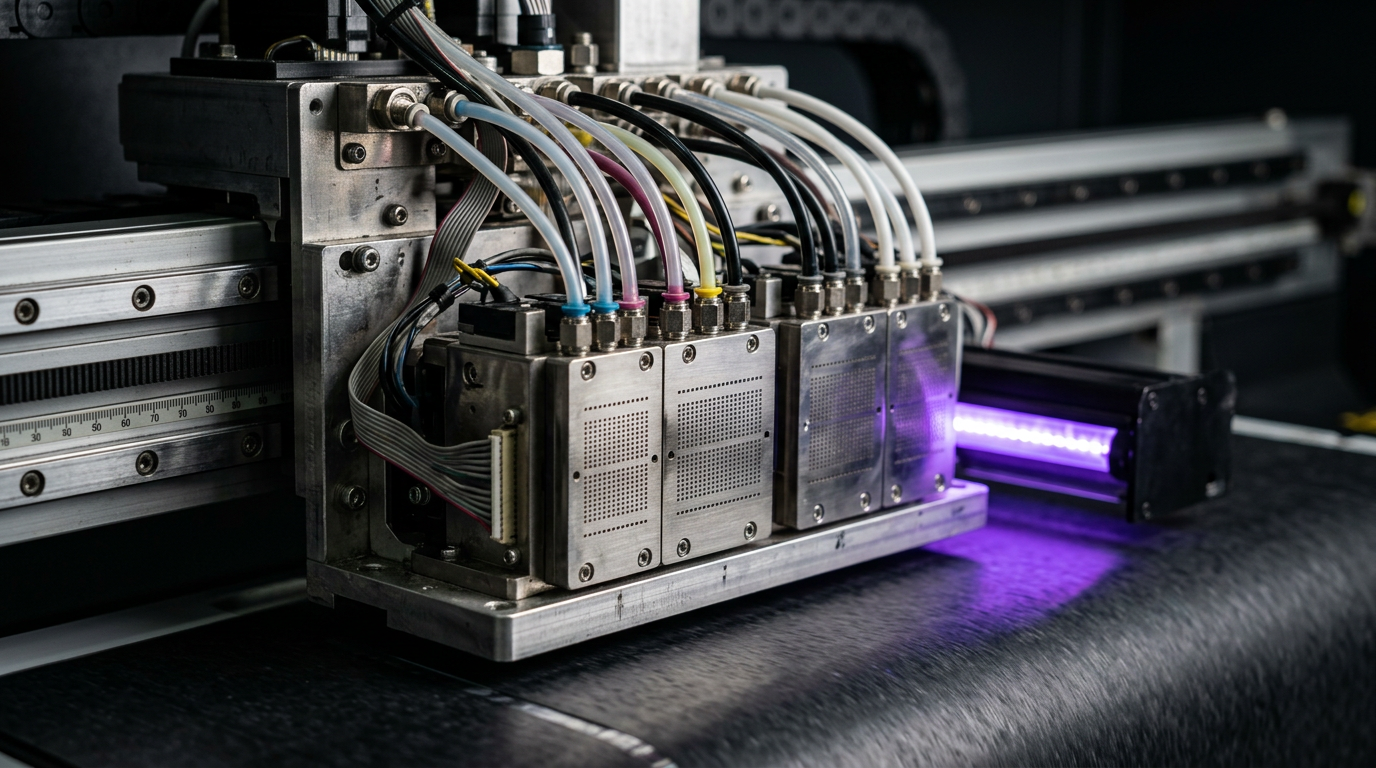
Direct answer: Resolution, droplet size and print passes describe different aspects of inkjet output. Resolution concerns spatial detail, droplet size is ink volume, and passes describe how printing is built up. None alone guarantees a specific quality or speed.
Engineering Principles and Components
| Topic | Function | Practical check |
|---|---|---|
| Resolution | A spatial measurement usually expressed as dots per inch (DPI). | Check whether a specification refers to native nozzle arrangement, addressable output or a selected print mode. |
| Droplet size | The volume of an ejected drop, often reported in picolitres (pL). | Smaller drops may support detail, but final appearance also depends on ink, media and control. |
| Passes | The number of scans or interleaved print cycles used to build output in a given mode. | The meaning and production speed depend on the machine and RIP. |
| Productivity | Finished output per unit time at a specified quality setting. | Measure a real job including loading, passes, curing or drying and finishing. |
Practical Shop Checklist
- Compare the same artwork, material, viewing distance and coverage when comparing machines.
- Ask whether quoted speed includes the chosen pass mode, white layers and actual production conditions.
- Test fine text, gradients, solids and edge quality on the material you intend to sell.
- Record nozzle condition, ink, profile and media because all affect the result.
Why These Three Terms Are Often Confused
Printer advertisements commonly mention high DPI, tiny droplets and a choice of pass modes. These figures describe different parts of the process. DPI relates to spatial density or addressable positions. Drop volume describes how much ink is delivered in an individual droplet. Passes describe how a machine builds an image over scans or print cycles. A favourable figure in one category does not tell you the other two, or how a finished job will look.
For a shop owner, the useful question is not simply which machine has the largest number on a specification sheet. Ask which combination produces acceptable detail, colour and durability on the intended material at a practical finished-job rate. The printer, RIP, ink, media, environment, operator and finishing process all affect that answer.
Understanding DPI in an Inkjet Specification
DPI means dots per inch. In a print mode it can describe how densely output positions are addressed in one or two directions. Specifications may list two numbers because the carriage travel direction and the media advance direction are controlled differently. Exactly what a manufacturer means by its stated figures should be confirmed in the relevant documentation.
A head’s physical nozzle arrangement is not necessarily identical to the resolution number shown in a printer’s software. The printer can build an image through movement and multiple cycles, while the RIP determines how image information is converted into firing instructions. A specification may refer to native head characteristics, an addressable mode, an apparent result or a marketing description. Do not assume those terms are interchangeable.
More addressed positions can help represent small details when the rest of the system can place and hold them reliably. However, the printed mark has a physical size, and neighbouring marks can overlap or spread. Higher nominal DPI does not automatically produce a visible improvement on every substrate, especially if the source artwork, ink behaviour or printer condition limits the result.
When comparing products, ask for the exact print mode, direction, number of passes and ink configuration used to achieve the quoted resolution. Request a sample containing the artwork elements you actually sell. A high number without a mode description cannot establish a reliable quality or productivity comparison.
Artwork PPI Is Not the Same as Printer DPI
A raster image is made from pixels. Its effective pixels per inch at final output size describes how much image data is available across the intended print dimensions. Printer DPI describes a different part of the output process. The RIP converts image pixels, vector objects and colour information into a pattern the printer can produce. One artwork pixel is not automatically one physical ink drop.
If a small low-resolution photograph is enlarged substantially, the file may not contain enough detail for a close-viewed print. Increasing the printer’s output setting cannot recreate detail that was not captured in the source. Vector text and artwork behave differently because their shapes can be rendered at the required size, although effects and embedded images may still be raster.
Check the final dimensions in the RIP and inspect fine details before production. Discuss expected viewing distance with the customer. A large banner viewed across a road and a small product label inspected at arm’s length do not necessarily require the same artwork preparation or acceptance criteria. Avoid promising a universal PPI number without knowing the content, process and viewing conditions.
What Is a Picolitre Droplet?
Drop volume is often given in picolitres, abbreviated pL. One picolitre is one trillionth of a litre. It is a measure of volume, not the final diameter of the spot on the substrate. The spot depends on how the drop lands and interacts with the surface, including ink formulation, coating, absorption, surface energy and drying or curing behaviour.
Some printheads and printer configurations can use more than one drop volume. Depending on the implementation, a RIP and printer may combine drop sizes to represent tones or build coverage. Availability and behaviour are specific to the head, ink and selected mode. Ask whether a quoted minimum drop size applies to the production mode being demonstrated, and whether it applies to all installed ink channels.
Small drops can support fine gradations and detail in an appropriate system. Larger drops can contribute to coverage in some designs. Neither observation means every small-drop mode is better or every large-drop mode is faster. The overall result depends on firing performance, pattern design, dot placement and media response. A stable, well-configured system may outperform a higher-specification system that is poorly maintained.
Dot Formation on Different Materials
After a drop leaves the nozzle, it travels to the material and forms a mark. A coated film, absorbent fabric and rigid plastic sheet can produce very different results even when the printer sends similar firing instructions. A dot may spread, merge with a neighbouring dot or remain more confined depending on the ink and surface. The visual result is a property of the complete print process.
For example, a fine line that looks crisp on a suitable coated film may appear softer on a more absorbent textile. Conversely, a mode that looks acceptable in a small isolated detail may struggle with smooth solids if the profile, coverage or curing process is unsuitable. These examples describe possible outcomes, not a guarantee for a particular material.
Always test on the actual production substrate, including its coating or surface treatment. Record the material supplier and batch if repeatability is important. Do not assume that two materials with the same generic label will respond identically. When the substrate changes, a new proof and possibly an appropriate media setting or profile may be needed.
What Does a Print Pass Mean?
In a scanning printer, the carriage moves across the media while selected nozzles fire. The machine advances the material or otherwise positions the next print area as the image is built. A mode described by its number of passes commonly reflects how the printer distributes that work across scans or cycles. Manufacturers do not always use pass terminology identically, so confirm the definition in the machine’s software or manual.
Distributing output over more passes may help reduce the visibility of certain placement or coverage irregularities, depending on the printer’s interleaving and masking strategy. It can also change throughput because the job may require more carriage travel or processing time. The magnitude of either effect is machine and mode specific. More passes are not a universal cure for banding or missing nozzles.
Some machines print in both carriage directions; others offer a unidirectional mode or use a different architecture. Direction and pass count are related to the selected mode but are not the same parameter. If output looks different between modes, check the manufacturer’s alignment procedure and inspect nozzle condition before deciding that the machine needs replacement parts.
How the RIP Builds a Printable Image
The RIP prepares a job for the printer using the available driver, print mode and colour settings. It interprets artwork, applies the configured colour workflow and converts the result into output instructions. The RIP may provide mode choices that affect resolution, pass count, drop usage, direction or layer sequence, depending on the device.
Colour management and linearisation are separate from the simple act of choosing a DPI number. An appropriate profile is associated with a particular printer, ink, substrate and settings workflow. Changing print mode or media can change appearance, and an existing profile may no longer be appropriate. Follow the RIP and profile provider’s guidance rather than assuming one profile is correct for every configuration.
Save production presets with clear names. A useful record identifies the printer, media, ink set, mode, direction and relevant white-layer or finishing settings. Avoid overwriting a known working preset when testing a new configuration. Print and label a proof so that the team can return to a documented baseline.
Resolution, Banding and Nozzle Health
Banding appears as visible bands or repeated changes in density. It has multiple possible causes, including nozzle issues, media advance, alignment, print mode, ink delivery and substrate behaviour. The appearance of a band does not identify which component is responsible. A higher pass mode may make a defect less visible without eliminating its underlying cause.
Start with the manufacturer’s nozzle check and retain the result. If the pattern has missing or deflected marks, follow the approved recovery procedure. If jetting appears acceptable but the symptom remains, investigate the printer’s feed and alignment checks in the order specified by the manufacturer. Do not alter head voltages, internal service parameters or mechanical positions without authorisation.
Compare test prints under the same lighting, with the same media and image. Record whether bands run across the width or along the direction of travel, whether the spacing repeats and whether the issue affects a particular colour. These observations help a service engineer, but they do not prove a particular fault by themselves.
Print Speed: Advertised Rate Versus Finished Production
A machine specification may quote print speed for a particular mode under defined conditions. Actual shop productivity includes more than the time the carriage is printing. Loading, checking the file, cleaning, white layers, drying or curing, unloading, inspection and finishing can all affect the time required to deliver an acceptable item.
For a realistic trial, record the start and finish of a representative job and count only acceptable output. Divide the accepted quantity by the elapsed time for the scope you are measuring. State clearly whether the result includes setup, finishing and rejected work. For example, a measurement covering print time alone should not be presented as finished-job capacity.
Repeat the test across a few normal jobs if practical. Results can vary with artwork coverage, substrate size, handling and print mode. Do not use an isolated demonstration as a guaranteed daily production figure or as a basis for a financial return without checking real operating conditions and costs.
How to Compare Two Print Modes Fairly
- Choose the job. Select a representative image with fine text, gradients, photographs, solid areas and the colours customers need. Include white layers only where the actual job requires them.
- Set a baseline. Confirm normal machine condition with an approved nozzle check. Use the same substrate, ink, artwork size, temperature range and viewing conditions where practical.
- Document both modes. Record the selected resolution, passes, direction and any other settings shown by the printer or RIP. Note which profile or preset was used.
- Print labelled samples. Keep samples identifiable without marking the image area. Measure the time consistently, and note whether setup, white ink or finishing is included.
- Inspect the outcome. Look at fine detail, text edges, banding, solid coverage, gradients and colour match at the actual intended viewing distance.
- Check end use. If adhesion, wash resistance, outdoor exposure or another property matters, agree an appropriate test with the supplier and customer. Appearance alone does not establish durability.
- Approve the setting. Save the chosen preset and physical proof. If neither mode meets the requirement, investigate the workflow or consult the supplier instead of promising an unsupported result.
Example: A Product Label Job
Suppose a shop receives a label design with small text, a logo and a smooth colour background. The team first checks the final artwork size and the actual label stock. They print a nozzle test, confirm the chosen media preset and produce a sample using the normal quality mode. The customer reviews the proof at the expected viewing distance.
If the text is unclear, the team checks whether the source artwork is sufficiently detailed and whether the printed line is spreading on the stock. If the background has visible bands, they examine the nozzle pattern and perform the machine’s approved feed or alignment checks where relevant. They may compare another supported mode, but they keep the ink, material and artwork constant as far as practical.
The team records the accepted mode and sample rather than claiming that a particular DPI guarantees legibility. If the label must survive cleaning, moisture or contact with a product, its suitability requires a separate agreed test. This example is illustrative, not a reported customer result.
Example: A Large Sign Viewed from a Distance
A large sign may contain photographs and large lettering intended to be read from several metres away. A mode selected for a small label may consume more time than necessary for the sign, while a very fast setting may produce unacceptable bands or colour differences. The right decision depends on the actual artwork and the customer’s acceptance standard.
Produce a representative section at final scale, then inspect it at the intended distance as well as close up. Confirm colour with an agreed proof and measure the production time for the selected mode. Keep in mind that a sample section cannot automatically prove the dimensional accuracy or consistency of an entire long run; test the complete workflow where those properties matter.
Questions to Ask a Printer Supplier
- What does the stated DPI represent: head characteristics, a supported output mode or another measurement?
- Which drop volumes are available with the installed head, ink and demonstrated mode?
- How does this machine define its pass settings, and which direction is used?
- Was the advertised speed measured with the same substrate, coverage, white layers and quality mode that we need?
- Can we see a nozzle check and a sample of our own artwork on our intended material?
- Which RIP preset or profile was used, and what changes when the media or print mode changes?
- What routine maintenance and training does the manufacturer require?
- What warranty and service terms apply to the head and ink system?
Keep answers in writing alongside the sample and the quotation. Specifications are useful for narrowing a shortlist, but a controlled demonstration is a stronger basis for judging whether a particular configuration meets your needs.
Common Misconceptions
Higher DPI always means a better print. Not necessarily. It is one parameter in a workflow that also includes artwork, ink placement, media, profile and machine condition. Judge the actual sample.
The smallest droplet is always the fastest choice. Drop volume alone does not establish speed. Head design, firing strategy, passes, coverage and motion all contribute.
More passes fix every banding problem. They can change how a defect appears, but nozzle faults, feed errors and other causes still require diagnosis.
A high-quality screen image will always print well at any size. Screen viewing can hide insufficient source detail or colour differences. Inspect the file at its intended output dimensions and approve a physical proof.
A printer speed specification equals sellable finished output. It may exclude loading, curing, inspection and rejects. Measure the actual scope before using it for planning.
Useful Records for Repeat Jobs
Keep a simple job record: artwork version, final dimensions, printer, ink, media identity, RIP preset, mode, pass count, direction and date. Attach the approved proof or store an identified sample safely. Record any required curing or finishing procedure without inventing settings that were not specified by the relevant supplier.
If a repeat job differs from the proof, check what changed before adjusting multiple controls. A replacement media batch, missing nozzle, altered profile or new print mode may matter. Retain the new and old samples and consult the supplier or technician where the cause is unclear. A repeatable documented workflow is more useful than relying on a single headline resolution number.
Further Reading
For a manufacturer’s discussion of head alignment and the importance of the loaded media and nozzle condition, see Epson’s printhead alignment guidance. That document applies to its specified equipment; always follow the manual for your own machine. See also our guides to artwork resolution and banding diagnosis.
Related Engineering Guides
Start with how a piezo printhead works and digital inkjet machine anatomy. For a machine-specific question, share your model on our contact page.
Frequently Asked Questions
Is a higher DPI always better?
Not necessarily. Source artwork, ink, media, calibration, drop placement and viewing distance all affect visible quality.
What is a picolitre?
A picolitre is a unit of volume equal to one trillionth of a litre. Printhead droplet specifications commonly use pL.
Does a smaller droplet automatically print faster?
No. Speed depends on head design, firing, number of heads, pass mode and the whole printer workflow.
What is a print pass?
It is part of the printer scan or interleaving process used to build the output. Definitions and settings vary by printer.
Do more passes always remove banding?
No. More passes can affect the appearance of some defects, but nozzle, feed, calibration and media issues still need diagnosis.
Should I compare brochure speed alone?
No. Compare finished output at the quality, material and settings required for your actual job.
What should a demonstration include?
Bring the intended artwork and substrate and ask for fine details, solids and a measured production run at the quoted mode.
