



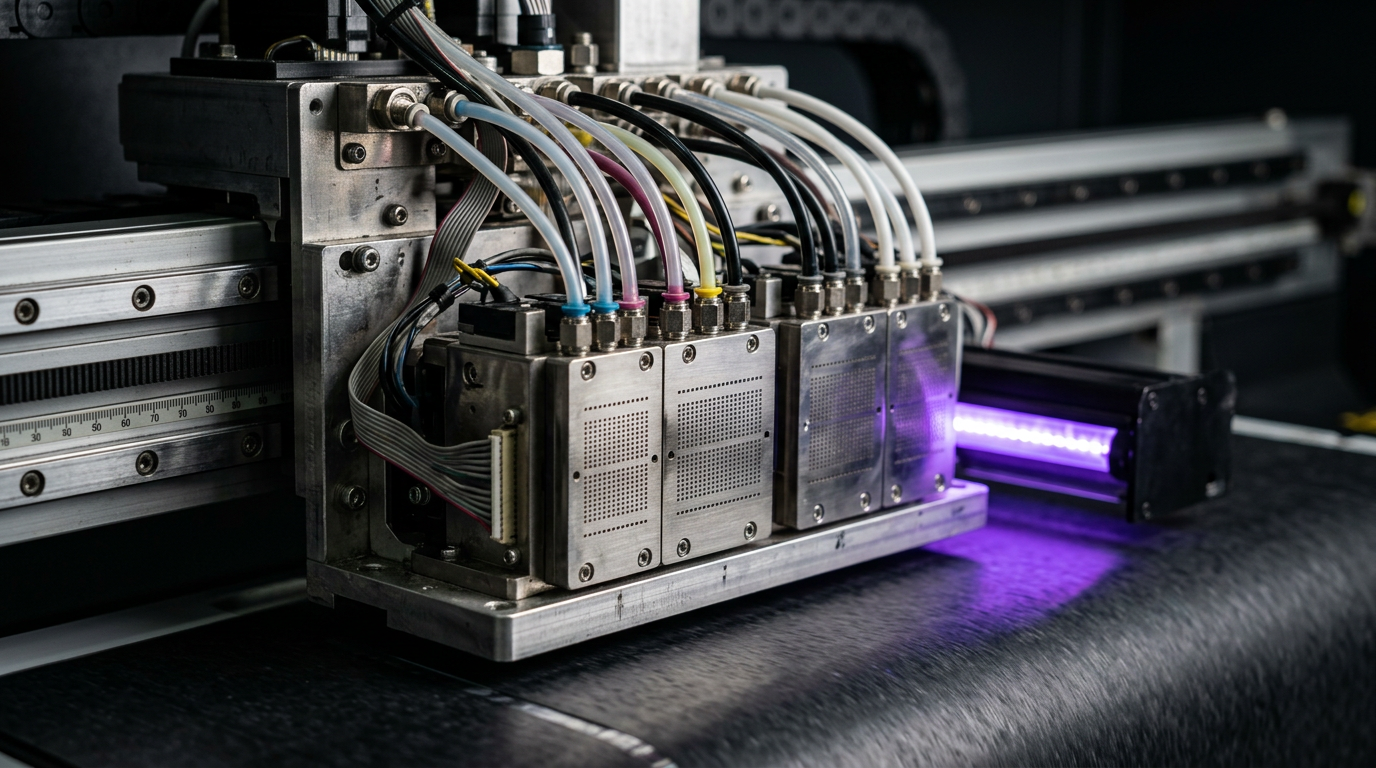
Direct answer: A missing nozzle mark is a symptom, not proof that the printhead is permanently damaged. Dry ink, contamination, air, capping problems, incompatible supplies and electrical or mechanical faults are possible causes; the exact system and manufacturer procedure matter.
Engineering Principles and Components
| Topic | Function | Practical check |
|---|---|---|
| Drying or inadequate capping | Ink can dry if the approved parking or capping process is ineffective. | Inspect only as permitted by the manual and follow the approved shutdown procedure. |
| Contamination | Particles or incompatible supplies can disrupt the ink path. | Use specified ink, filters and cleaning materials. |
| Air or supply issue | Ink delivery may be interrupted or unstable. | Check authorised indicators; avoid forcing fluid through the head. |
| Electrical or physical damage | A fault or contact with media may affect jetting. | Stop operation and ask a qualified engineer to diagnose the head and machine. |
Practical Shop Checklist
- Save a dated nozzle check and record the ink, media and machine status.
- Use only the manufacturer-recommended cleaning and recovery sequence.
- Do not repeatedly force cleaning cycles without understanding ink use and waste capacity.
- Escalate persistent dropout, leakage or electrical faults to an authorised engineer.
What Nozzle Dropout Means
In an inkjet printer, each nozzle is expected to eject ink when commanded. A nozzle check makes that behaviour visible through a pattern designed for the particular printer. If an expected mark is absent, the nozzle may not be jetting correctly. If a mark is displaced, the drop may be deflected rather than completely missing. Either condition can affect output, but a single pattern does not establish the underlying cause.
The words clogging and dropout are often used as if they mean the same thing. Clogging suggests an obstruction, while dropout describes a missing or inconsistent jetting result. Drying or contamination can be involved, but air in the system, unstable ink delivery, maintenance-station problems, electrical issues and physical damage are also possible. Start with evidence instead of assuming that every missing line needs the same chemical or a new head.
Different printer architectures, ink chemistries and head designs have different maintenance requirements. This guide provides a diagnostic framework for operators. It does not replace the manual for your printer or authorise opening guarded areas, modifying electrical connections or performing service tasks beyond your training.
How the Ink System Supports Jetting
A printer is a coordinated system. Ink is stored in a reservoir or cartridge and delivered through the machine’s designed supply path. Depending on the model, the path can include filters, dampers, valves, pumps or circulation. The head receives electrical firing signals and ejects drops through its nozzles. A carriage or media movement system positions those drops on the substrate.
The maintenance station may include a cap, wiper and waste-ink path. Their exact functions and maintenance procedures vary by machine. If the supply path, maintenance station or printhead is not operating as intended, a nozzle test can show gaps or displaced marks. A supply problem can sometimes resemble a head fault, so the most effective investigation follows the complete system rather than focusing only on the nozzle plate.
Ink properties and compatibility matter as well. The approved formulation is selected for the machine and head. A different ink or cleaner can affect jetting, materials in the fluid path or both. Follow the equipment and ink suppliers’ documented compatibility guidance. Appearance, colour or a similar product name is not enough to establish compatibility.
Clogging, Missing Jets and Deflection
A missing jet means the expected mark is not visible in the test, assuming the pattern was printed and read correctly. An intermittent jet may appear on one test and disappear on another or under different operating conditions. A deflected jet fires but lands away from its expected location. Each can be associated with different conditions, and more than one may occur at the same time.
On the finished print, missing or displaced marks can contribute to banding, colour shifts, uneven solids or detail problems. These symptoms also have other possible causes. Media advance, head alignment, RIP settings, substrate changes and other factors must be considered when the nozzle pattern does not explain the visible defect.
Use the printer’s own documentation to interpret its pattern. Test patterns and channel arrangements are not universal. A gap that appears in one manufacturer’s example may have a different meaning on another design. If the result is difficult to read, use the recommended test media and seek help rather than guessing which component has failed.
Common Causes to Investigate
1. Drying during idle periods
Ink near an exposed nozzle can dry or change condition when the printer is left idle or parked incorrectly. The risk and appropriate prevention depend on the ink and equipment. Some printers require a particular shutdown or maintenance routine, while others specify special preparation for extended inactivity. Use the exact manufacturer’s instructions instead of a generic schedule found online.
A dried nozzle is a possible explanation, not a diagnosis from the appearance of a gap alone. Save a pattern and perform only the authorised recovery procedure. If a machine has been idle longer than usual, record the duration and shutdown method for the technician.
2. Capping and maintenance-station condition
The cap and related maintenance components can affect the way a head is parked or serviced. A worn, contaminated or incorrectly positioned part may be relevant on some printers. However, the location and inspection method depend on the design, and some checks require trained service access.
Operators should inspect and clean only those accessible parts covered by the manual, using the specified materials. Do not move the carriage by hand, dismantle the cap or adjust a mechanism unless the manufacturer authorises that procedure. Record any visible abnormality and stop if ink leakage or a mechanical fault is suspected.
3. Contamination or incompatible materials
Particles, contaminated supplies or an unsuitable fluid can interfere with an ink path. Filters are designed into some systems, but their presence does not make contamination harmless. The head, tubing, seals and other components may respond differently to an incompatible chemistry. Never mix unknown inks or cleaners because another shop reports that they work.
Record ink and cleaner names, batch details and any recent change. Keep containers closed and follow supplier handling instructions. If incompatibility is suspected, stop introducing additional fluids and consult the supplier for an approved response. Unauthorised flushing may complicate the diagnosis and damage equipment.
4. Air or unstable ink delivery
An interruption in ink supply or air in a fluid path can contribute to inconsistent jetting on some systems. The symptom may appear after a supply change, service event, low-ink condition or another disturbance, but a timing association alone does not prove the cause. The correct check depends on the design and may require a trained engineer.
Do not disconnect tubes, draw ink through a head or apply pressure to a circuit as an improvised repair. Follow only the operator checks in the manual. Note the affected colours, when the issue began and any visible warnings. If the issue returns quickly after approved cleaning, that history is useful to the service provider.
5. Ink settling and circulation
Some pigmented inks, including common white inks, require specific handling because pigment can settle. A machine may use agitation or a circulation arrangement, but not all systems operate in the same way. Follow the ink manufacturer’s instructions and the printer’s approved schedule for the installed configuration.
Do not assume every white-ink head circulates ink at the nozzle, or that circulation eliminates all maintenance. If white output is inconsistent, inspect the approved test and record the supply condition and relevant warnings. Do not alter circulation settings or open the system unless the manufacturer specifically permits it.
6. Physical or electrical faults
A head strike, damaged cable, electrical error or other physical problem can cause symptoms that cleaning will not reliably fix. If a strike occurs or the printer reports an electrical fault, stop safely and follow the manufacturer’s instructions. Avoid repeated operation that may worsen the condition.
Electrical inspection, head removal, mechanical adjustments and internal repairs belong to appropriately qualified personnel using the machine’s service procedure. An operator should preserve error messages, test prints and a description of the event instead of opening guarded areas or attempting to bypass a safety interlock.
How to Read and Preserve a Nozzle Check
- Use the correct procedure. Select the nozzle test specified for the model and load the recommended media. Make sure the test can be seen clearly.
- Label the sample. Record the machine, date, ink configuration and whether the print was made before or after a cleaning cycle. Use the shop’s normal recordkeeping procedure.
- Compare with the manual. Identify which pattern belongs to which channel only according to the printer documentation. Note gaps, displaced marks and affected groups.
- Check consistency. If permitted by the manual, compare a later test with the first. Record whether the same marks are missing or whether the pattern changes.
- Keep the physical evidence. A clear photograph can help a remote technician, but keep the original print where practical. Avoid sharing confidential customer artwork unnecessarily.
Good lighting and suitable media make a difference. A poor photograph, low-contrast pattern or damaged test sheet can be misleading. Ask the service provider which images and machine details are most useful. Do not assume that an online pattern for another printer is a valid reference for your device.
A Step-by-Step Operator Workflow
Step 1: Stop the affected job and describe the defect. Note whether the issue affects a single colour, a particular area or the entire print. Record error codes and recent changes. If there is a leak, a head strike, smoke, an electrical warning or another safety concern, stop safely and follow the manufacturer’s emergency and service instructions.
Step 2: Establish a baseline. Print the approved nozzle check if the machine is safe to operate and the manual permits it. Save the result before cleaning. Record the machine’s ink, media and print mode, plus whether the printer had been idle or recently serviced.
Step 3: Check operator-accessible conditions. Review the ink status, relevant alerts and basic loading conditions as instructed. Confirm that approved supplies are in use. Do not remove guards or make internal adjustments. If an obvious operational issue is identified, correct it only using an authorised procedure.
Step 4: Use the recommended cleaning sequence. Select the cleaning function and level specified for the symptoms and equipment. Follow any waiting periods, cycle limits or subsequent checks in the manual. Cleaning consumes ink and may fill a waste system; repeated powerful cycles are not a substitute for diagnosis.
Step 5: Print and compare another test. Label the new pattern with the action performed. Improvement, no change or a changing pattern are all useful observations. Do not immediately conclude that the head must be replaced or that the issue is permanently resolved.
Step 6: Follow the documented escalation path. If the test remains unsatisfactory, the issue returns, or the next step is outside operator training, contact the authorised service provider. Share the patterns, machine configuration and exact actions already taken. Avoid adding unrelated adjustments while waiting for advice.
Step 7: Validate the actual job. Once the machine meets the manufacturer’s nozzle-check criteria, print a representative production sample. Inspect the affected colour and defect under agreed conditions. A clear pattern is helpful but does not independently prove colour accuracy, adhesion or end-use durability.
Why Repeated Cleaning Can Be Counterproductive
It is tempting to run cleaning cycles repeatedly when a line is missing. The approved procedure may include more than one cycle, but its limits and waiting periods should come from the manufacturer. Excessive cleaning can consume ink, add waste and delay investigation of a supply, maintenance-station or electrical problem. The effect depends on the printer and cleaning routine.
Write down each action and result. If cleaning improves a pattern briefly and the same problem returns, tell the technician rather than continually repeating the cycle. That behaviour may help distinguish between possible causes, but it does not identify a single cause with certainty.
Never substitute an unknown solvent, soak a head or force fluid through a nozzle because a generic tutorial suggests it. Different inks and components require different chemicals and methods. Inappropriate pressure or fluid can damage the system or invalidate service terms. Consult the supplier before any procedure outside the user manual.
Symptom Comparison: A Practical Table
| Observed result | What it may suggest | Next responsible step |
|---|---|---|
| One or more absent pattern marks | A jetting issue; the cause is not established by the pattern alone | Save the print and follow the approved cleaning and re-test procedure. |
| Marks appear displaced | Possible nozzle deflection or a pattern-reading issue | Compare with the machine manual and use the specified test media. |
| Pattern improves then deteriorates again | A recurring condition that needs further investigation | Record timing and actions and ask the service provider for guidance. |
| All marks present but print shows bands | Feed, alignment, mode, substrate or other causes remain possible | Use the manufacturer’s relevant diagnostic tests; avoid changing several settings at once. |
| Problem begins after a strike | Potential mechanical or head damage | Stop safely and request qualified inspection. |
| Ink leakage or electrical alert | A potential safety or equipment fault | Stop according to the manual and contact qualified service. |
This table is not a fault-code guide. A technician may need additional checks, and the correct sequence varies by machine. Always use the documentation for the installed equipment and ink.
Example: Dropout After a Weekend Shutdown
Consider a shop that returns after a weekend and finds gaps in a nozzle test. The operator records the affected colours and confirms how the printer was shut down. The first pattern is kept as the baseline. The operator then uses the cleaning sequence recommended for that machine and prints a second test.
If the pattern improves, the operator continues according to the manual and validates output with a representative sample. If the problem persists or returns, the shop shares both tests and the shutdown history with its service provider. The example does not prove that the nozzles dried or that the cap failed; it illustrates how to gather useful evidence before assigning a cause.
Example: Missing White During Production
A shop using a compatible white-ink system notices that white coverage changes during a job. The operator stops the job, records the current settings and checks the model-specific white-channel pattern. They note the ink product, recent handling and any circulation alerts that the normal controls display.
If the manual provides an approved operator action, they follow it and compare the next test. If the pattern does not stabilise, they contact the supplier. They do not mix in another white ink or open a fluid line to investigate. The resulting evidence can help the technician assess several possible causes without risking an improvised intervention.
Prevention: Build a Documented Routine
Prevention begins with the machine manufacturer’s maintenance schedule. Assign an operator to record nozzle checks, routine cleaning, shutdowns and alerts. Use compatible ink and supplies, and keep the environment within the equipment supplier’s specified operating conditions. Avoid inventing universal temperature, humidity or cleaning-cycle limits for all print technologies.
Prepare for idle periods according to the supplier’s instructions. Where applicable, verify that the machine has completed its normal parking or shutdown sequence. Track maintenance-station consumables and waste capacity as directed. Store ink correctly and note batch changes. These practices reduce avoidable uncertainty, though they cannot guarantee that a fault will never occur.
When staff change shifts, hand over unresolved faults and the actions already taken. A dated test pattern and a short log are more useful than a verbal note that the printer was cleaned. The log should not contain passwords or unnecessary customer data.
When to Call a Service Engineer
Escalate immediately when there is a head strike, leak, electrical warning, damaged component or work requiring guarded access. Also seek help when the approved recovery sequence does not restore acceptable jetting, when symptoms repeatedly return, or when you are unsure whether a procedure is authorised. Follow local safety procedures and the equipment manufacturer’s instructions.
Provide the machine model and serial number securely, the ink product, affected channels, dated nozzle checks, error messages and a list of actions taken. Mention recent ink changes, long idle periods, service work or unusual events. Ask the technician to explain the diagnosis and the evidence for a proposed repair or replacement.
Before authorising a replacement, request the part identification, compatibility, labour scope and warranty terms. A missing pattern line alone does not establish that a head is beyond recovery. Equally, not every head can be recovered. The decision should be based on model-specific diagnostics and the service provider’s findings.
Further Reading and Related Guides
See Epson’s guidance on nozzle checks before alignment for an example of a manufacturer-specific workflow. Its instructions apply to the specified equipment, not every printer. Continue with our guides to nozzle check patterns, ink supply components and service records.
Related Engineering Guides
Start with how a piezo printhead works and digital inkjet machine anatomy. For a machine-specific question, share your model on our contact page.
Frequently Asked Questions
Does a missing nozzle mean the printhead is dead?
No. Several recoverable and non-recoverable faults can look similar; diagnose according to the manufacturer procedure.
Can I use any cleaning fluid?
No. Use the fluid specified for the exact ink and machine; incompatible chemicals can damage components.
Should I force cleaning fluid through a head?
Do not force fluid or pressure through it. Follow the manufacturer instructions and leave invasive servicing to qualified personnel.
What is nozzle deflection?
A nozzle ejects droplets away from the intended position, which may appear as shifted marks in a test pattern.
Why is capping important?
A functioning capping and parking system helps protect the nozzle area during idle periods; the exact routine is model-specific.
Will more print passes fix a clog?
They can change how a defect looks, but they do not repair a non-jetting nozzle or resolve its cause.
When should I call service?
Call a qualified engineer if the approved recovery steps fail, if you see leaks, a head strike or electrical warnings, or if the manual requires service.
