



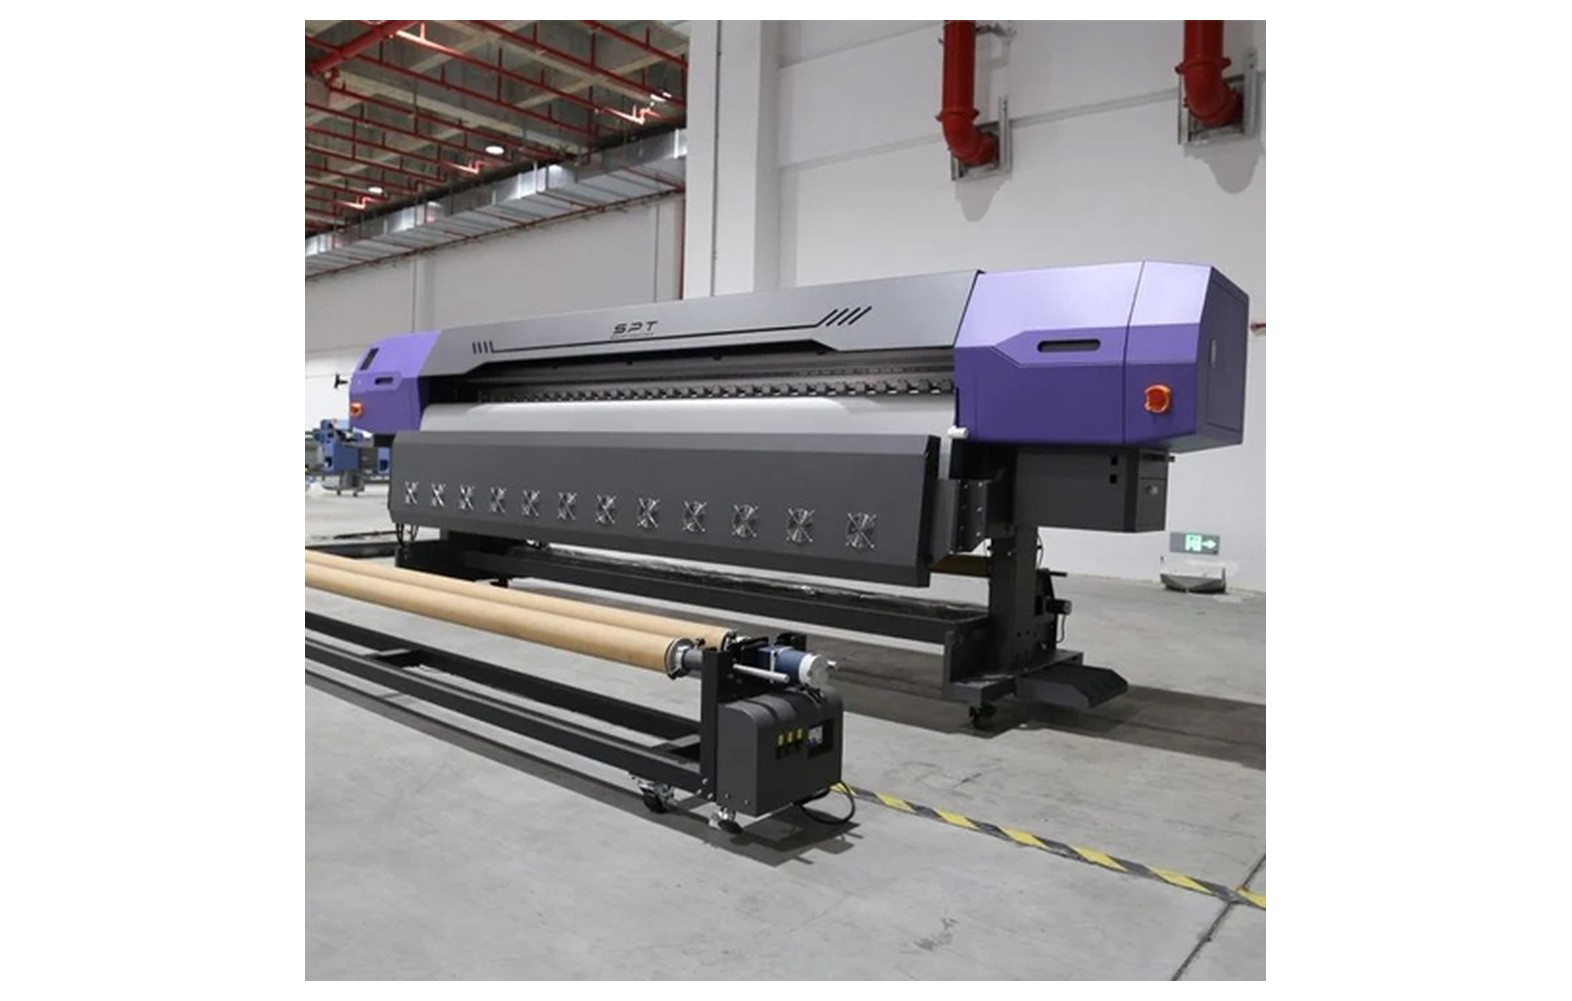
Direct answer: Media width, roll weight and tension influence how a wide roll is loaded, advanced and taken up through a flex printer. Use the exact machine’s supported media dimensions and weight, follow its loading and tension instructions, and test a representative roll over a meaningful length. More tension, a wider roll or a heavier roll is not automatically better.
Why roll handling matters
A wide-format printer must keep the media aligned as it travels through the print zone and onto the take-up system. Uneven tracking can cause wrinkles, skew, edge movement, inconsistent image placement or contact with the printhead. A problem that appears only after several metres may not show in a short sample.
The printer, roll, core, unwind arrangement, media guides, feed system and take-up unit operate together. The correct setup depends on the machine and the specific media. This guide explains planning and observation; it does not replace the manufacturer’s operating instructions or authorise adjustments by untrained staff.
Wide rolls can be heavy and awkward. Have the site assess manual handling and use trained personnel and suitable lifting equipment where the manufacturer and local safety requirements call for them. Never stand under a suspended roll, bypass a guard or improvise lifting points.
Distinguish media width from printable width
Sixteen feet is approximately 4.88 metres, while five metres is approximately 16.4 feet. A machine marketed with either label can have different maximum media width, maximum printable width and edge margins. Request the exact model specification and confirm the loaded roll fits both the media path and the intended artwork.
A roll may fit physically while the printer cannot print to its edges. Allow for required margins, trim, hems or joins when checking a job. Ask the finishing and installation team for the actual allowance rather than applying a generic value. If a full-width image is critical, demonstrate it on the proposed stock.
Check whether the machine supports narrower rolls and where they should be positioned. Some systems have specific guidance for centring, edge guides or unused sensors. Follow the manufacturer’s procedure and verify tracking; do not assume a narrow roll will behave like a full-width roll.
What roll weight changes
A roll’s total weight depends on its width, length, material construction, core and other factors. Media weight per unit area alone does not establish the weight of the complete roll. Ask the supplier for actual or specified roll weight and compare it with the printer, unwind and lifting equipment limits.
As media unwinds, roll diameter and weight change. The system’s behaviour can vary during a long run. A printer that starts smoothly may show tracking or tension problems later if the setup, roll or machine is unsuitable. Monitor the run according to the manufacturer’s instructions and document where a problem first appears.
Do not exceed a manufacturer’s load limit or split a roll using an improvised method. If the desired media is too heavy, ask the supplier and machine manufacturer for an approved roll format or handling solution. Check the floor, storage racks and transport route as well as the printer.
Core, diameter and winding direction
Confirm the supported core diameter, roll outside diameter, winding direction and printable side. A roll can have the right width yet fail to fit the spindle or feed path. The take-up core and attachment method also need to match the machine and media. Use only components approved for the model.
Inspect the roll and core before loading for crushing, telescoping, uneven edges or visible damage. Record product and batch information so a problem can be traced to the material. Do not assume an irregular roll can be corrected by increasing tension; consult the media supplier and technician.
Ask how the roll should be stored and acclimatised for the actual product. Environmental conditions, handling and storage can affect some materials. Follow the supplier’s guidance and avoid exposing rolls to conditions that could damage the media or create a safety hazard.
What tension means in a roll workflow
Tension is the force applied to keep media controlled as it moves between unwind, print and take-up sections. The appropriate setting depends on the machine, media, roll and operating mode. Too little or too much tension can contribute to handling defects, but the same visible symptom can have several causes.
Low or uneven control may allow slack, shifting or inconsistent winding. Excessive or uneven force may stretch or distort some media, affect alignment or stress components. These are possible effects, not a diagnosis of a particular machine. Follow the manufacturer’s recommended range and adjustment procedure for the exact configuration.
Never change tension by adding weights, defeating a sensor or altering a drive system outside the approved method. A trained operator should use the documented controls; mechanical or electrical service belongs to an authorised technician. Stop the machine safely when a defect creates a risk of head contact or injury.
Unwind and take-up systems
The unwind system presents the roll to the printer, while the take-up system collects output. Sensors, drive controls and tension arrangements vary by model. Ask the supplier to demonstrate the complete path with the actual media, including how the leading edge is attached and how the system responds as the roll diameter changes.
Check the manufacturer’s instructions for winding direction, alignment, core support and whether the print needs a specified handling or drying interval before take-up. An unsuitable take-up setup can create wrinkles, offsetting or damage even when the printer’s image looks acceptable at the platen.
Inspect the beginning, middle and end of a representative run. Record any edge movement, telescoping, loose winding or marks, and compare them with a control roll if available. Do not reach into moving equipment or touch heated or electrically hazardous parts; use the approved stop and inspection procedure.
Alignment and media tracking
Load the roll using the machine’s documented reference points and guides. Check that the core is supported and the media enters the print path evenly. The correct method for centring or aligning a roll is model-specific. Do not force the material or use a makeshift guide that can damage the edge.
After the initial feed, inspect whether the media tracks consistently across the width. Follow the manufacturer’s calibration instructions for media advance and any approved sensors. A visible skew can result from roll quality, loading, guide setup, tension or machine condition; changing several settings at once makes the cause harder to identify.
Retain a short test record with roll identification, settings and observations. If the media begins to wrinkle or approach the printhead, stop according to the safe procedure. A head strike can damage both the print and equipment and should be assessed by qualified service personnel.
Width and job layout
A wide roll can hold a full-width graphic or multiple smaller jobs, depending on the approved RIP and workflow. Nesting can reduce unused material, but the layout must allow required margins, trim and safe separation. Do not crowd artwork into unsupported edge areas to improve a theoretical yield.
Compare roll consumption with finished output. The area fed through the machine can include margins, gaps, setup and rejects that are not part of the finished graphic. Record those categories consistently when estimating material use. A wider roll is not automatically more economical if the mix of work creates large unused areas.
For panelled work, preserve the approved orientation, overlap and numbering. The handling team should know which side is the printed face and how the output will be finished. Keep a current panel map with the job ticket.
Print quality and long runs
Media movement can affect registration, apparent banding and alignment, but a print defect can also arise from artwork, ink, printheads, profile or environmental conditions. Record the pattern and ask a qualified technician to diagnose it. Do not assume that every line is a tension problem.
Run representative artwork at the intended quality mode, including solids, gradients and relevant detail. Check output across the width and at intervals over a meaningful length. Measure dimensions where registration matters and compare adjacent panels before finishing. A short, narrow test cannot establish full-width long-run performance.
Use the manufacturer’s approved inspection and cleaning procedures. Do not touch the carriage, moving media or hot surfaces during operation. If repeated marks, wrinkles or contact appear, stop safely and isolate affected output rather than continuing to print a customer order.
A practical acceptance trial
- Record the machine: model, supported media width, roll weight, diameter, core and take-up configuration.
- Record the roll: supplier, construction, width, length, weight, core, winding direction and batch.
- Plan safe loading: use trained staff, the approved lifting equipment and the manufacturer’s documented procedure.
- Set up: follow the approved alignment, feed, tension and take-up settings for the material.
- Print: use representative artwork and the quality mode intended for sale.
- Observe: check tracking, wrinkles, edge movement, image quality and take-up over a meaningful length.
- Inspect and measure: compare dimensions, accepted output and any rejects against pre-agreed criteria.
- Record and approve: document settings, defects, corrections and responsible sign-off.
Set the test length and acceptance criteria according to the job and supplier instructions. Include a safe stop procedure and do not leave an unattended trial running unless the machine and site procedures specifically allow it. A successful trial supports the tested combination, not every roll of every construction.
Diagnose common handling symptoms
Media moves sideways: stop safely and inspect loading, core condition, guides and the roll’s edges. Ask the supplier or technician to assess tracking using the manufacturer’s process.
Wrinkles appear: review media condition, alignment, supported settings and the feed path. Do not apply an improvised weight or reach into the moving machine.
Take-up winds unevenly: inspect the approved core, attachment, winding direction and alignment. Record when the issue begins and consult the operator manual or service provider.
Lines or registration errors appear: compare the test pattern and media movement, but also consider ink, heads, profile and artwork. A qualified technician should diagnose the actual machine.
Roll exceeds the stated limit: do not load it. Request a compatible roll format or an approved solution from the machine and media suppliers.
Planning cost and capacity
Include roll loading, changeovers, setup waste, accepted output, finishing and safe handling in a production estimate. A wider roll may improve nesting for one job mix and increase waste for another. Use measured production records rather than assuming a fixed yield.
For a hypothetical calculation, if a roll provides 1,000 square feet of usable material and 100 square feet is lost to margins, setup and rejects, 900 square feet remains for the defined finished output. This is an illustrative calculation, not an expected waste rate. Ensure the categories do not overlap or get counted twice.
Compare the cost of the roll, handling equipment, labour and potential downtime using current quotations and your own records. Do not trade safety or required maintenance for a nominal speed increase. Capacity is the accepted output of the whole workflow, including finishing, not merely the printer’s advertised speed.
Questions for the suppliers
- What are the actual maximum media and printable widths, margins, roll weight and diameter?
- Which core, winding direction and take-up arrangement are approved?
- What lifting equipment and operator training are required?
- Which settings and calibration procedure are recommended for this construction?
- How should a tracking or winding problem be documented and escalated?
- What changes in media construction require a new trial?
For engineering context, read our media feed and take-up systems guide. For selection, see 16 ft flex media selection and production capacity estimation.
Conclusion
Control wide-media production by verifying the actual width and roll limits, loading safely, using model-specific tension and take-up instructions and testing a representative long run. Document the complete combination and involve trained service personnel when symptoms persist.
Compare different rolls without changing everything
When two media products behave differently, first record their construction, width, roll weight, core, winding direction and storage condition. Confirm both are approved for the printer and ink. If practical and safe, compare them using the manufacturer’s recommended settings and the same representative artwork. A useful comparison keeps track of differences instead of treating every roll as interchangeable.
Do not alter multiple machine controls at once to force a damaged roll through the printer. Ask the supplier whether the roll itself is within its specification. A roll with a crushed core or uneven winding may need to be quarantined or returned rather than compensated for through an undocumented adjustment.
When a technician makes an approved change, record the original setting, the new setting, the reason and the result. Recheck print dimensions and quality after the change. If the adjustment affects another media type, maintain separate approved job settings and train operators to select the correct configuration.
Handover between shifts
For a long run spanning shifts, record the roll identification, remaining planned output, current job, settings, observations and any defects. The incoming operator should understand the safe stop and escalation procedure and should not assume that an unexplained mark has already been approved.
Keep access routes clear around stored rolls and take-up equipment. Check that the completed output is identified and protected according to the media and ink supplier’s guidance. If a roll is removed before completion, document its orientation and condition for the next approved setup.
Review repeated tracking problems with both the media supplier and machine service provider. A pattern linked to a particular batch, width or core can be useful evidence. Preserve samples and records without attempting unsafe running inspections or unsupported repairs.
Before production release, compare the observed tracking and accepted print with the customer’s dimensions and approved sample. Keep the supplier’s roll specification and the printer settings with the job record so that an operator can repeat the validated setup.
Frequently Asked Questions
Is a wider roll always more efficient?
No. Efficiency depends on the job mix, printable margins, nesting, setup waste and handling. Measure accepted finished output and material used for your actual orders.
Does media width equal printable width?
Not necessarily. The machine may need edge margins or have a smaller usable print area. Confirm both specifications for the exact model and material.
Can any 16 ft roll be loaded on a 16 ft printer?
No. Check maximum roll weight, diameter, core, width, winding and approved media as well as printable width. Follow the manufacturer’s handling instructions.
Will increasing tension fix wrinkles?
Not necessarily. Wrinkles can have several causes and excessive force can create new problems. Stop safely and follow the manufacturer’s troubleshooting process with trained personnel.
Why can tracking change during a long roll?
Roll diameter and weight change as material unwinds, and alignment or winding defects may develop over time. Test a representative length and record when the symptom appears.
Is 5 metres exactly 16 feet?
No. Five metres is approximately 16.4 feet and sixteen feet is approximately 4.88 metres. Use the exact model and roll specifications.
Who should adjust the media handling system?
Trained operators should use only approved controls and procedures. Electrical or mechanical work and persistent defects should be referred to an authorised technician.
